This tutorial will serve as a BASIC guide to building your own cross-mode bridge from P25 to/from a Brandmeister DMR talk group. This tutorial is based on a Raspberry Pi 3B+ hardware, however it should be very similar on Ubuntu 18.04 or other current flavors of Linux.
Software packages include: DVSwitch from N4IRS: https://github.com/DVSwitch and the P25 Client software from G4KLX at https://github.com/g4klx/P25Clients
If you’re not comfortable with compiling source code, setting file permissions, or modifying firewalls/port-forwarding – Google for these things! There is plenty of help available for your specific software and hardware…
Terminal commands are in Italics, and must be run one line at a time…
OVERVIEW
You'll be installing and configuring several software components that all play together to transcode a DMR data stream to P25 and vice-versa using DVSwitch The DVSwitch packages support other modes as well (NXDN, YaesuFusion, D-Star), and while this document does not cover them, they do not seem wildly different from what we're doing here.
So - let's get on with it!
ARCHITECTURE
P25Reflector P25GatewayAnalogBridgeP25AnalogBridgeDMRMMDVMHostBM Master
BUILD
We are going to build from the P25 side to the Brandmeister side. The first component is the P25 Reflector. First, download the P25Clients source code from G4KLX from https://github.com/g4klx/P25Client.
BUILD THE REFLECTOR:
With the method of your choice, download and extract the client software to its default path (P25Clients-master) in /Downloads, and from there. Open a terminal window and.
cd /P25Clients-master/P25Reflector
ls -la
Confirm that you have source files, and they're in the right place: there should be a “P25Reflector.cpp” in this folder.
Copy the ini file to its new home:
sudo cp P25Reflector.ini /etc
Tweak the .ini file - Change “Daemon=1” to “Daemon=0”
sudo vi /etc/P25Reflector.ini
Save and Exit the editor.
Compile (Make sure you’re in ~/Downloads/P25Clients-master/P25Reflector)
make
Copy the compiled executable file and script to their new location:
sudo cp p25Reflector /usr/local/bin/
sudo cp P25Reflector.sh /usr/local/bin/
sudo chmod +x /usr/local/bin/P25Reflector.sh
Test it!
cd /usr/local/bin
sudo ./P25Reflector.sh start /etc/P25Reflector.ini &
On first run, you should see something like this (ignore the DMRIds.data error)
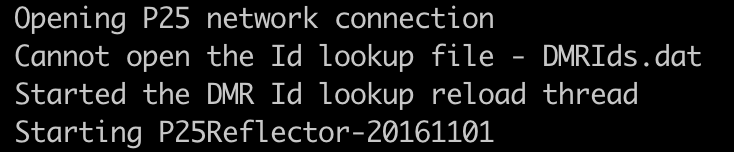
Leave this terminal window open for now... it should show repeating "No Repeaters Linked" messages...
BUILD THE P25GATEWAY:
P25Gateway creation is very similar to the P25Reflector. Open a new terminal window and:
cd /P25Clients-master/P25Gateway
ls -la
Confirm that you have source files, and they're in the right place: there should be a “P25Gateway.cpp” in this folder.
Copy the ini and P25Hosts file to their new home:
sudo cp P25Hosts.txt /etc
sudo cp P25Gateway.ini /etc
Compile:
make
Copy the P25Gateway to its new location:
cp P25Gateway /opt/P25Gateway/
INSTALL DVSWITCH COMPONENTS:
Steve, N4IRS has made installing and configuring his tools very easy. Follow his instructions for adding the software repository and install the Analog Bridge and the MMDVM_Bridge using his instructions at https://dvswitch.groups.io/g/main/message/1224
The 'short version' from Steve's notes:
cd /tmp
wget http://dvswitch.org/install-dvswitch-repo
chmod +x install-dvswitch-repo
./install-dvswitch-repo
apt-get update
Install:
sudo apt-get install dvswitch
You should now have a P25Gateway, Analog_Bridge, md380-emu and MMDVM_Bridge folder in /opt - confirm that:
ls -la /opt
Copy the MMDVM_Bridge.ini to /etc
cp /opt/MMDVM_Bridge.ini /etc
Understanding the next few steps are critical - you'll recall from the Architecture section that 2 instances of Analog_Bridge are needed. We are going to create those and their associated .ini files now.
cd /opt/Analog_Bridge
cp Analog_Bridge Analog_Bridge_p25
cp Analog_Bridge.ini /etc/Analog_Bridge_p25.ini
cp Analog_Bridge Analog_Bridge_DMR
cp Analog_Bridge.ini /etc/Analog_Bridge_DMR.ini
 TEST POINT B1
You should now have all of the software installed. Let's make sure the ini files that were copied to new folders have landed where we intended. The following files should be in your /etc folder (there will be others - including other .ini files...)
List the .ini files in /etc:
ls -la /etc|grep .ini
-
P25Reflector.ini
-
P25Gateway.ini
-
Analog_Bridge_DMR.ini
-
Analog_Bridge_P25.ini
-
MMDVM_Bridge.ini
Should all be there...

Likewise, the following FILES should be in these locations:
-
/usr/local.bin/P25Reflector/P25Reflector.sh
-
/usr/local.bin/P25Reflector/P25Reflector
-
/opt/Analog_Bridge/Analog_Bridge_DMR
-
/opt/Analog_Bridge/Analog_Bridge_P25
-
/opt/MMDVM_Bridge/MMDVM_Bridge
CONFIGURE

There's no nice way to say this - the following section will require tedious, exacting, precise trial and error. :) The various components installed need to communicate with each other and do so via a collection of ports and everything needs to line up. It can be tricky. Remember we're working from P25 to DMR, and will 'follow the data' through each step. Thankfully, Steve N4IRS makes this as easy as possible - but it does require some very precise changes. You may have noticed during installation that we copied all of the .ini files to /etc - make sure you're editing these, and not the original files from /opt or /usr/local/bin. Worst case, if an edit goes bad you can always copy the default version back into /etc and start again. P25Reflector.ini needs very little tweaking, and we did that at install. (Changed Daemon from "1" to "0").

CREATE LOG DIRECTORIES

sudo mkdir /var/log/P25Gateway
sudo mkdir /var/log/P25Reflectorcp
sudo mkdir /var/log/mmdvm

P25GATEWAY

 sudo vi /etc/P25Gateway.ini

[General]
Callsign={Your callsign here}
RptAddress=127.0.0.1
RptPort=32010
LocalPort=42020
Announcements=1
Daemon=0 <--CHANGE "0"

[Id Lookup]
Name=DMRIds.dat
Time=24

[Log]
FilePath=/var/log/P25Gateway/
FileRoot=P25Gateway

[Network]
Port=42010
HostsFile1=/opt/P25Hosts.txt <--CHANGE to /etc/P25Hosts.txt
HostsFile2=./private/P25Hosts.txt
ReloadTime=60
ParrotAddress=127.0.0.1
ParrotPort=42011
Startup={Your P25 Reflector Talkgroup here}
InactivityTimeout=10
Debug=0
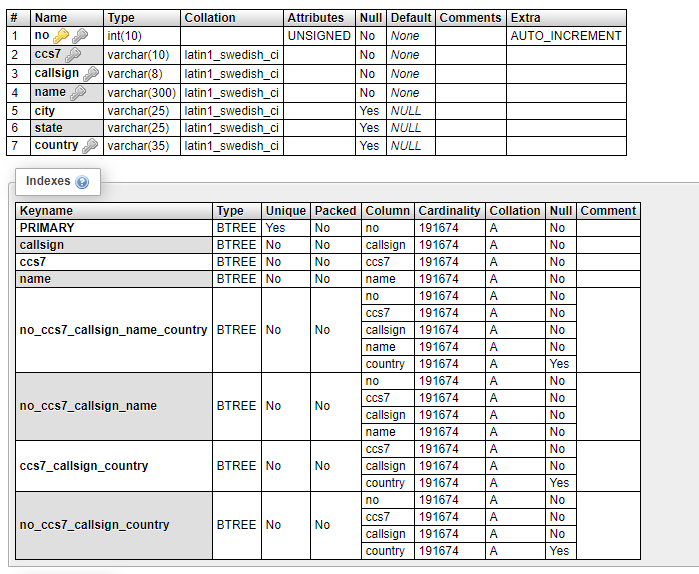
P25HOSTS

 sudo vi /etc/P25Hosts.txt

Determine what P25 Talkgroup you will use, and supply that in the P25Hosts.txt file in this format: TG(tab)127.0.0.1(tab)41000


Save and exit.

 TEST POINT C1

Lets test connectivity between the gateway and the reflector. You should still have the P25Reflector running in a terminal window, and it's probably reporting "No Repeaters Linked" every several seconds. We will start the P25Gateway and see if it connects to the P25Reflector:

cd /opt/P25Gateway
./P25Gateway /etc/P25Gateway.ini &

You should see a process ID number - not an error message.


Now - in the P25Reflector terminal session, you should see the connection after a few seconds ('P25GATEWAY is my 'Callsign' in the .ini)


"Can't get MMDVM user" error? I've heard reports that the Daemon setting in the P25Gateway file may actially need to be 0
ANALOG_BRIDGE_P25

 sudo vi /etc/Analog_Bridge_P25.ini

The Analog Bridge files only need a couple of modifications - only those lines are listed below:

[GENERAL]
decoderFallBack = true
useEmulator = false

[AMBE_AUDIO]
server = 127.0.0.1
fromDMRPort = 34100 {IMPORTANT}
toDMRPort = 34103 {IMPORTANT}
ambeMode = P25 {IMPORTANT}
minTxTimeMS = 2000
gatewayDmrId = {YOUR DMR-ID+2-Digits. See MMDVM_Bridge notes}
repeaterID = {YOUR DMR-ID+2-Digits. See MMDVM_Bridge notes}
txTg = {YOUR P25 TALKGROUP from P25Hosts.txt HERE}
txTs = 1
colorCode = 1

[USRP]
server = 127.0.0.1
toASLPort = 34001 {IMPORTANT}
fromASLPort = 32001 {IMPORTANT}
aslAudio = AUDIO_UNITY
agcGain = -20
dmrAudio = AUDIO_UNITY
dmrGain = 0.35
ANALOG_BRIDGE_DMR

 sudo vi /etc/Analog_Bridge_DMR.ini

[GENERAL]
decoderFallBack = true
useEmulator = false

[AMBE_AUDIO]
server = 127.0.0.1
fromDMRPort = 31100 {IMPORTANT}
toDMRPort = 31103 {IMPORTANT}
ambeMode = DMR {IMPORTANT}
minTxTimeMS = 2000
gatewayDmrId = {YOUR DMR-ID+2-Digits. See MMDVM_Bridge notes}
repeaterID = {YOUR DMR-ID+2-Digits. See MMDVM_Bridge notes}
txTg = {IMPORTANT - Brandmeister Talkgroup Number to link}
txTs = 1
colorCode = 1

[USRP]
server = 127.0.0.1
toASLPort = 32001 {IMPORTANT - must match FROM port in P25.ini}
fromASLPort = 34001 {IMPORTANT -must match TO port in P25.ini}
aslAudio = AUDIO_UNITY
agcGain = -20
dmrAudio = AUDIO_UNITY
dmrGain = 0.35
MMDVM_BRIDGE

 sudo vi /etc/MMDVM_Bridge.ini

The MMDVM Bridge connects to the BrandMeister master server, and is essential a 'virtual' hotspot. What you configure here will appear in your BM Dashboard at brandmeister.network. A note about DMR-IDs: You do NOT need to register for a new DMR-ID for this hotspot. Simply append 2 digits to your existing ID, and BM will know what to do. Example: If my DMR-ID is 1234567, I can use anything from 123456701 through 123456799 for the MMDVM_Bridge ID, or any hotspot.

MMDVM_BRIDGE is another large file - but only a few lines need to be tweaked from default.

[General]
Callsign={YOUR CALL}
Id={YOUR DMR-ID+2-Digits}
Timeout=180
Duplex=0

[DMR]
Enable=1 {IMPORTANT}
ColorCode=1
EmbeddedLCOnly=1
DumpTAData=0

[P25]
Enable=1 {IMPORTANT}
NAC=927

[DMR Network]
Enable=1 {IMPORTANT}
Address=3101.repeater.net {IMPORTANT - Set your BM Master per your region!)
Port=62031
Jitter=750
Local=62032
Password=passw0rd
Slot1=1
Slot2=1
Debug=0

[P25 Network]
Enable=1 {IMPORTANT}
GatewayAddress=127.0.0.1
GatewayPort=42020
LocalPort=32010
Debug=0
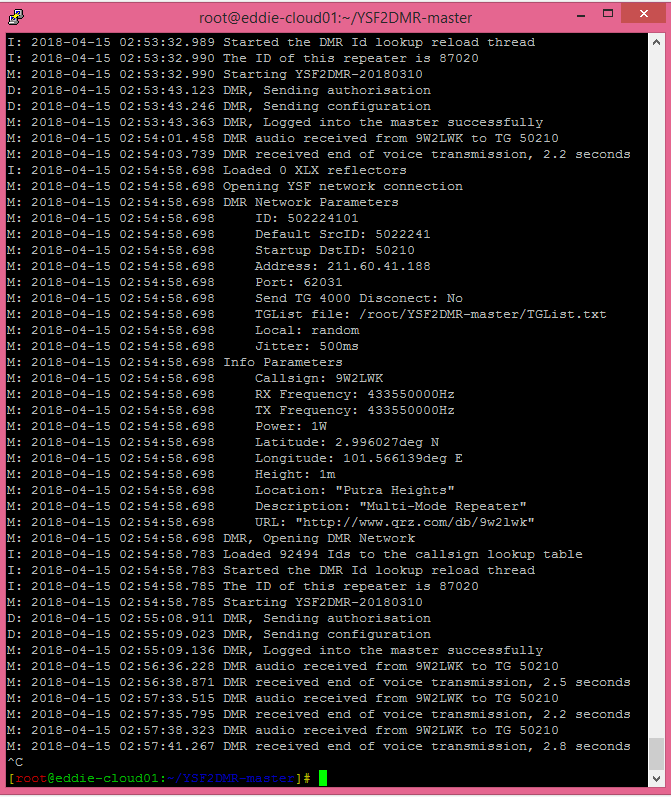
 TEST POINT C2

Confirm your MMDVM_Bridge connects to Brandmeister.

cd /opt/MMDVM_Bridge

./MMDVM_Bridge /etc/MMDVM_Bridge.ini &

After a few seconds, you should see "MMDVM_Bridge is Running", followed by a successful connection to the BM master. Log onto your Brandmeister dashboard, and have a look in "My Hotspots" for your new 'hotspot'.

If this fails - double check the MMDVM_Bridge.ini file....
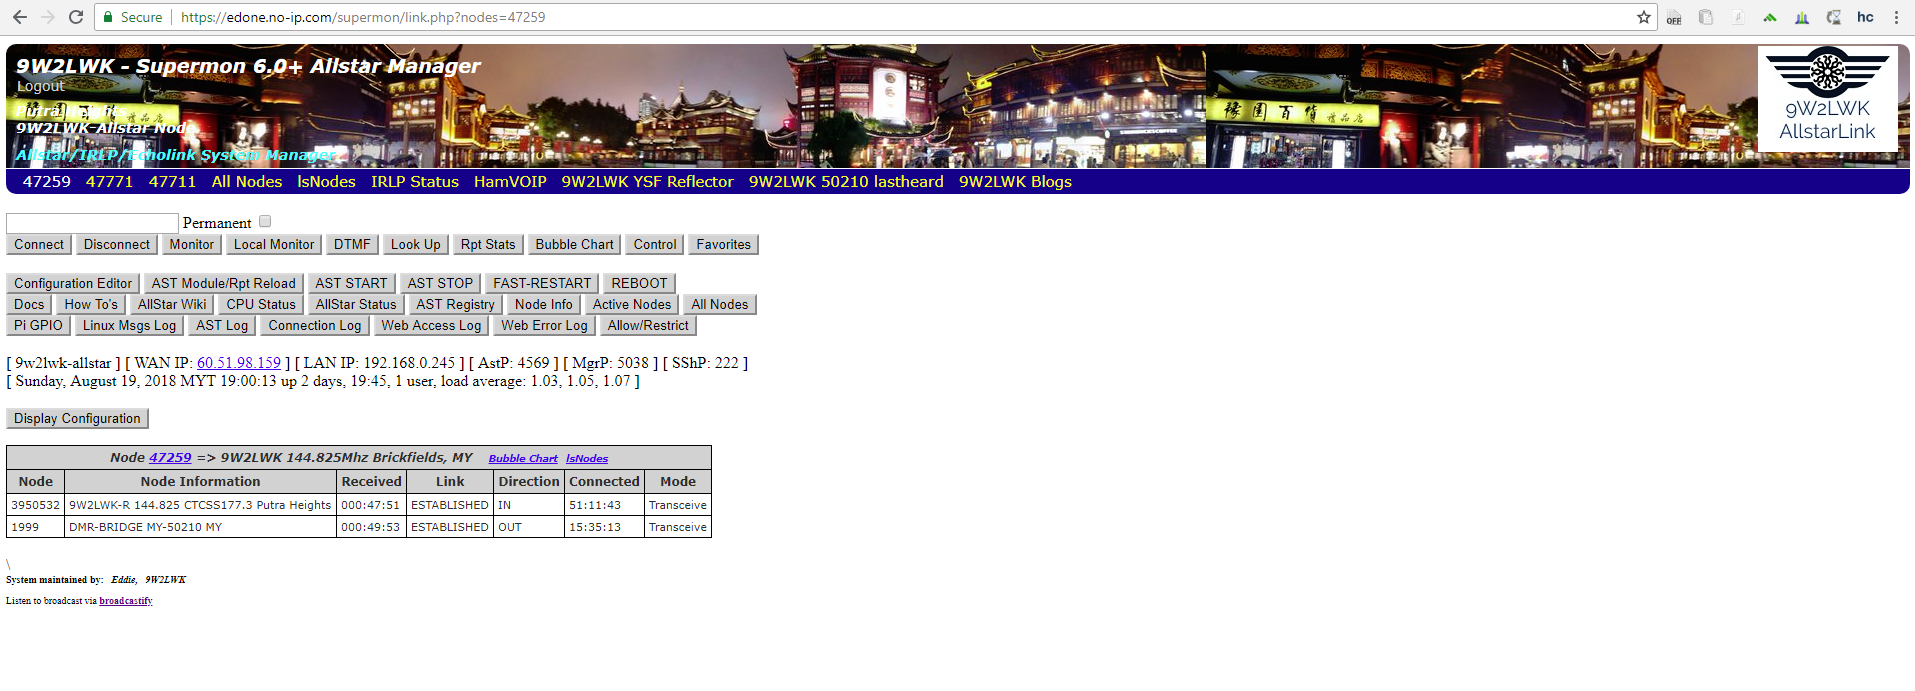
BRANDMEISTER CONFIG

Once you've verified that the MMDVM_Bridge has connected to BrandMeister - you need to configure a static talk group for your hotspot. This will push the DMR traffic from BM to your hotspot... Use the same DMR talkgroup that you chose in the ANALOG_BRIDGE_DMR.ini file....
PI-STAR CONFIG

Optional step for setting up a hotspot running Pi-Star to connect to your bridged Talkgroup. You'll need the IP address or FQDN that Hotspots will use to access your reflector.

SSH into your Pi-Star via the method of your choosing, and set the filesystem to read/write:

rpi-rw

Get permissions to modify files:

sudo su

Add your reflector to the P25Hosts file

sudo vi /root/P25Hosts.txt

Enter your information in the format: {TG#}tab{ReflectorIP}tab(41000) - there are also  instructions shown in the file.

Save and Exit.

Force Pi-star to re-load the P25Host file:

sudo pistar-update

When the update completes, exit the pi-star SSH session, and pull up the Dashboard. You should see the TG and IP domain in the "P25 Startup Host" on the Pi-Star configuration screen. You can set this as your startup now or not...
RUN THIS BEAST!
OK - so here we are... let's run everything together! First - let's start clean. Reboot your device.
Run each of these in it's own terminal window initially - this will help with troubleshooting.
cd /usr/local/bin/
./P25Reflector.sh start /etc/P25Reflector.ini &
(new window)
cd /opt/P25Gateway
./P25Gateway /etc/P25Gateway.ini &
(new wind0w)
cd /opt/Analog_Bridge
./Analog_Bridge_DMR /etc/Analog_Bridge_DMR.ini &
(new wind0w)
cd /opt/Analog_Bridge
./Analog_Bridge_P25 /etc/Analog_Bridge_P25.ini &
(new window)
cd /opt/MMDVM_Bridge
./MMDVM_Bridge /etc/MMDVM_Bridge.ini &
(Pro-Tip: I have written a script to launch all of these. Once you've worked out any bugs in the setup and are running without issues, grab the bridge.sh script from here and place it in /opt. You can then start everything up with ./bridge.sh &)
A note about
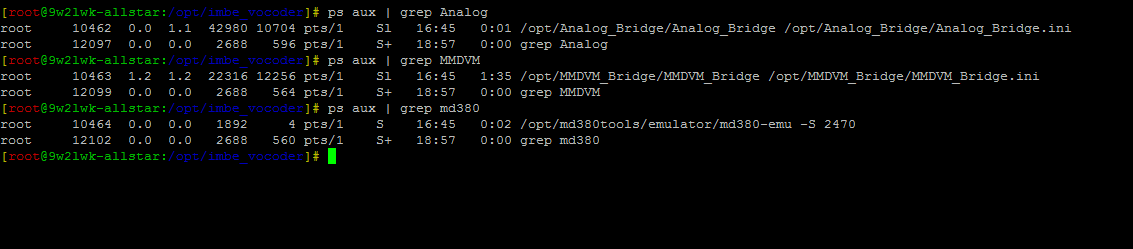
HIT IT WITH SOME P25!
This is the final step, get a P25 radio and make sure you’ve got the frequency, NAC and talkgroup programmed correctly, and transmit.
In the terminal windows, you should see messages indicating DMR and P25 TX/RX activity. Pay particular attention to the P25Reflector and MMDVM_Bridge info - those seem to convey the most in terms of where something may be going sideways. If that happens, check, and re-check, firewall and IP addresses, DMRIDs, ports and talk groups... and check out the DVSwitch groups.io board. for support! Thanks to everyone involved in creating and maintaining these software tools!